The Kitchen Prep

Wednesday, November 19, 2014

Spiced Cider Braised Pork Tenderloin | Sponsored Post: Fiji Water - Perfection Takes Time


Think of some of your favorite dishes to eat and make around the holidays. The ones that warm your soul and bring feelings of nostalgia welling up from deep inside. You know the ones I'm talking about.

Grandma's homemade pies. Mom's slow-cooked roast. Your family's famous Sunday "gravy". 

Many of these dishes have one thing in common: They take time to make. That's why they're so special! Because you don't have time to whip them up on a daily basis. They may only make an appearance once a year, and therefore, they earn a special place of honor when they do show up at the dinner table.

I know many of us have fallen into the "30 Minute Meals" mentality because, well... life. Most of us don't have the luxury of being able to start a slow-cooked dinner at 10 a.m., which is a shame because who doesn't love the thought of coming home to something that's been baking, roasting or simmering all day long?


Sure, shortcuts can still produce some pretty delicious meals, but the truth is simple: Perfection Takes Time.

The best things in life often do. 

Fiji Water knows all about how perfection is a process not to be rushed. Starting as rains falling over the Fijian rain forest, Fiji Water makes its way from the clouds down through layers of ancient volcanic rock. Along the way, it gathers minerals and electrolytes that give the water it's distinct, smooth taste. Finally, it gathers in a protected artesian aquifer where it sits until it is bottled at the source.


Now, doesn't that make Cider Braised Pork Tenderloin sound like a cinch? ;)

In honor of life's slow and wonderful processes, I came up with this seasonal recipe that takes a little time but is so worth the effort.


Pork tenderloin is seasoned, seared and braised, nestled among onions, apples and fragrant sage in this slow-cooked meal. It's both simple and succulent. Because the meat cooks for several hours, it becomes fork-tender and absorbs all the amazing flavors that surround it as it simmers away. 

Your house will smell like fall, and your taste buds will rejoice when they taste the product of patience -- pure perfection.


Get this and other "Perfection Takes Time" recipes on Fijiwater.com.

Disclosure: Compensation for this post was provided by Fiji Water via Honest Cooking. As always, the opinions here are all my own!

Monday, November 17, 2014

Roasted Red Pepper Dip | VSL #3 Probiotics

Disclosure: This is a product-provided, sponsored conversation that contains affiliate links. All opinions, text and experiences are my own. VSL#3 is a medical food and must be used under medical supervision.


Even though I talk about food incessantly around here, I rarely ever discuss how our bodies are affected by what we put in them. I mean, I assume you know that even though I share tons of treat recipes, I definitely fuel up with nutritious foods on the daily... mostly so I can justify those treats! So, today I'm taking a second to discuss just one tiny fraction of the wide world of healthy and nutrition: the benefits of probiotics.

Thanks to the fact that my husband is in a natural health field {chiropractic}, I learned about the perks of taking a good probiotic years ago. I kind of go around recommending them to people like they are magic pills; they're sort of awesome.

Probiotics are a mysterious thing to many, even though I think yogurt commercials and health-related media figures like Dr. Oz have done a good job of getting the buzzword out there for the masses. But even though you might have heard of probiotics, you might still have questions about how they're helpful.

So, what exactly are probiotics? Scientifically speaking, they are "a viable mono or mixed culture of bacteria which, when applied to animal or man, beneficially affects the host by improving the properties of the indigenous flora." (Havenaar and Huis in Veld, 1992.)

Um, say what?

Don't let all that fancy terminology confuse you. In short, probiotics are happy bacteria that help boost the natural, good bacteria that occur in your body. That can be confusing because we often think of bacteria as a bad thing. But not all bacteria need to be eliminated! It is because of bacteria that we are able to stay healthy and have a balanced ecosystem in our guts, as icky as that sounds.

Sometimes because of lifestyle, eating habits, illness and genetics, our body's ecosystems get thrown off kilter and we can overgrow certain types of bacteria that make us feel sick or cause unwanted symptoms. That's when supplements and friendly bacteria boosters can really come in handy!

Irritable Bowel Syndrome (IBS) is one of those troubling disorders that lots of folks struggle with. Basically, IBS is a condition of the large intestine that can cause all kinds of very pesky stomach discomfort. There are certain triggers that can cause IBS to flare up like eating certain foods, stress and hormonal changes. The good news is IBS can be managed by making good dietary choices and -- that's right -- taking our allies, probiotics!

Except, here's the thing: Not all probiotics are made equal. Just like other products out there on the market, some probiotics are better quality or more complete than others.


VSL #3 is a great example of a high-potency probiotic that's worth taking. It's so potent, in fact, that it's considered a "medical food" {10 times more potent than your average probiotic!} meaning that you'll have to pick them up in the pharmacy section of your local drug store. No prescription is required, but they do need to be maintained at cool temps to keep those "good bugs" alive and active, so your pharmacist will have them refrigerated.

Along with maintaining a healthy diet, VSL #3 can improve the symptoms {like gas and bloating} that come with IBS. You know what else makes for happy tummies? Delicious food.

It's pretty awesome that registered dieticians like Patty Catsos now have cookbooks, blogs and recipes galore that are IBS-friendly. Whether you're cooking for family members who struggle with these disorders or bringing a dish to a party, it's nice to have tasty options to please taste buds and keep bellies happy.

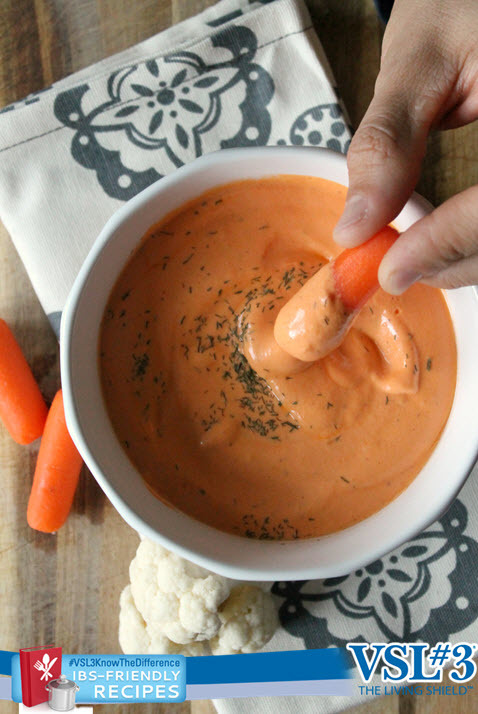
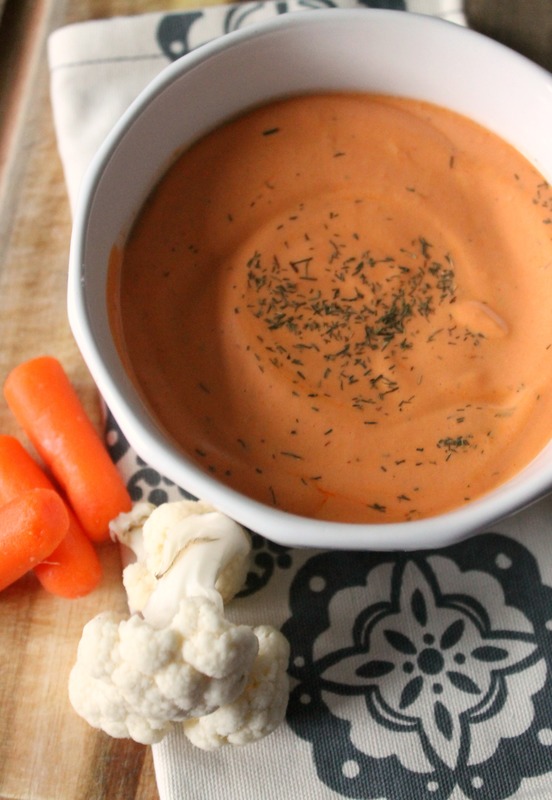
This Roasted Red Pepper Dip is a great option to share with family and friends, whether or not they have dietary struggles. The recipe is quick and easy to throw together and has a variety of uses! We liked it as a dip, but it also works as a salad dressing and even a quick pasta sauce to toss together for a quick, simple meal.


What are some of your favorite IBS-friendly recipes? You can find some more at VSL3.com: http://www.vsl3.com/discover/ibs-recipes.aspy

Check out VSL #3 on Facebook & make sure to enter their GastroNomical Giveaway!

Roasted Red Pepper Dip

Created by Patsy Catsos, RD for VSL#3®

1 cup roasted red peppers, jarred or home-roasted
1 tablespoon garlic-infused extra virgin olive oil
1 pound lactose-free cottage cheese
1 tablespoon fresh lemon juice
⅛ teaspoon white pepper
⅛ teaspoon Tabasco sauce (optional)

1. Place all ingredients in a food processor bowl or blender. Process or blend until smooth and creamy.

2. Serve chilled, with tortilla chips or fresh vegetables.

VSL#3® products must be refrigerated to maintain potency and is available at your local pharmacy. Look for VSL#3® in the probiotic aisle of your local drug store and bring the card to the pharmacist as it is kept behind the pharmacy counter in the refrigerator. ​

This is a product-provided, sponsored conversation that contains affiliate links. All opinions, text and experiences are my own. VSL#3 is a medical food and must be used under medical supervision.

Wednesday, November 12, 2014

Spiced Cider Jelly Candies | Bake Craft Sew 2014 + Blendtec Giveaway!


Can you believe it's that time of year again? Because I sure can't. It's time to start thinking about stocking stuffers and Christmas cookies and braving the malls once again -- the holidays are just about here!

I've obviously been preoccupied with preparing for my own special delivery this year, but that doesn't mean that I haven't had time to make some DIY treats for giving. {I actually have loaves of Chocolate Chip Pumpkin Pecan Bread packaged up and frozen for labor and delivery nurse thank you gifts once the baby decides to join us. Good thinkin' ahead, right??} Those are actually my favorite kind.

The lovely ladies running Bake Craft Sew are in full swing sharing 30 days of homemade, handmade and lovingly made gifts that you can whip up to give to friends, family and even complete strangers if that's your thing.

Last year, I shared my Creamy Eggnog Dip that is SO easy to make and looks oh-so-inviting when it's packaged up all pretty in a little jar with some embellishments.


This year, I'm sharing a recipe for these {again, easy-to-make!} Spiced Cider Jelly Candies. They look super fancy but really don't take much more work than boiling a few ingredients together and letting them set!


Head over to Leigh Anne's blog, Your Homebased Mom, for the recipe. Before you head over, make sure to enter the Rafflecopter giveaway below... it's for a Stainless Steel Designer BlendTec Blender worth $650!!! Now THAT's a gift you may want to keep. ;)

a Rafflecopter giveaway

Thursday, November 6, 2014

Crispy Potato & Parsnip Hash with Stonyfield Yogurt + DreamFarm


Disclosure: I am honored to be a member of the Stonyfield Clean Plate Club. I received product or coupons for writing this post, but all opinions are my own.


It amazes me that there are still relatively common foods that I haven't tried. Some just don't make it onto my radar and others puzzle me enough that I pick them up at the grocery store and think, "What in the world would I do with this?"

Parsnips are one such food.

During my Trader Joe's rounds last week I found that the parsnips {which happened to be particularly inexpensive} suddenly looked too intriguing to leave out of my basket. So they came home with me and we got acquainted.

Have you ever tried a parsnip? It's a root vegetable that looks a lot like a carrot with a pale complexion. Like maybe carrot's SPF-conscious cousins.

Knowing nothing about parsnips and how to prepare them -- but figuring that they couldn't be too different from other root veggies -- I decided to give them a go in a Crispy Potato and Parsnip Hash and see how they'd turn out.

I peeled them, chopped them and threw them into this cool little contraption that was sent to me to try: the Dreamfarm Vebo.


 It's a silicone basket where VEggies {and whatnot} can be BOiled, steamed and strained all in one convenient place. It was pretty nifty! {Although I have to tell you, you could get some serious steam burns if you're not careful pulling the basket out of the boiling water. Just a heads up.}


Despite the fact that I am not a big fan of carrots {I've tried so very hard to like the over the years, but I just can't do it!}, I really enjoyed the parsnips! It could have something to do with the fact that the way I prepared them gave them just the right amount of golden crispness on the outside and tender creaminess on the inside. The flavor was slightly sweet but not too strong and went perfectly with the Dutch yellow baby potatoes and onions that I roasted along with them.


We love this dish on Sunday mornings with breakfast fixins {read: topped with a runny egg and alongside a few strips of bacon}, or as a side dish with a big dollop of tart and creamy Stonyfield Greek Yogurt on top. You can mix some fresh chives into the yogurt for a little extra flavor, but it isn't even necessary.


Want a Vebo of your own? Enter to win one below! I'll be picking a winner at random next week. Good luck!

a Rafflecopter giveaway

Crispy Potato & Parsnip Hash with Stonyfield Yogurt Sauce 

1 pound Dutch yellow baby potatoes, cut into approximately 1 inch pieces
2 parsnips, peeled and cut into approximately 1 inch pieces
1 medium onion, diced
1/2 teaspoon onion powder
1/2 teaspoon garlic powder
Sea salt
Stonyfield Organic Plain Greek Yogurt
{Optional} Fresh or dried chives, chopped

1. Preheat oven to 450 degrees. Line a baking pan with foil and drizzle with olive oil. Set aside.

2. Place cut potatoes and parsnips into the Vebo. Place the Vebo in a pot filled with water until just covering veggies. Add about a teaspoon of salt to water. Boil for about 10-12 minutes or until the vegetables are fork-tender.  {If you don't have a Vebo, you can certainly dump the veggies directly into a pot.}

3. Meanwhile, saute onions until just tender in a small pan and set aside.

4. Carefully remove Vebo from pot to drain or pour vegetables into a strainer in the sink. Spread vegetables out onto prepared baking pan and gently toss with oil. {You may want to drizzle a bit more on top.} Add onions to mixture and toss together.

4. Sprinkle with onion powder, garlic powder and salt.

5. Roast for 20-25 minutes or until they're golden brown on the outside, giving them a turn about half way through cooking time.

Serve with a dollop of Stonyfield Greek Yogurt and chives sprinkled on top.

Tuesday, November 4, 2014

Pumpkin Dutch Apple Pie with Speculoos Crumble


It's November! So, naturally... pie.

You know, when the holidays roll around there are a lot of hard decisions to make. Like how to decorate, and what to buy for family and friends... and most importantly, whether that little space you left for dessert calls for a slice of pumpkin pie or apple pie. No one should have to choose.

This pie is the best of both worlds and you are going to LOVE it.

It's an apple pie smothered in a custardy hug from pumpkin pie filling. It's almost embarrassing to interrupt them, they go so well together.


But you know what really takes this pie over the top?

Cookies. Speculoos, to be precise. Yep, those are the crisp, spiced cookies that Trader Joe's turns into their famous "Cookie Butter."


It just seemed like a logical thing to crush up some Speculoos and add them to the crumbly topping for this pie. The spicy warmth and crunch of the cookies complement the tart apples and creamy pumpkin filling like they were destined to cross paths... sort of like me and Rosner's Appliances!

I'm guest posting over on their blog today and sharing this incredible recipe and fun little story of how I found out we go way back, so make sure to stop by and show them some love! Get the recipe here!


Are you a pumpkin or apple pie person? Will you be trying this two-in-one combo?

Friday, October 31, 2014

Prep's Picks: Around the "Web" Halloween Round Up!

Admittedly, I'm not really a "Halloween person." I like a good costume party as much as the next gal and am totally on board with any reason to eat mini candy bars, but other than that... I'm just not that into it. Especially the gruesome, scary and macabre parts. {I'm pretty sure this explains why.}

Having a food blog has made me more aware of holidays that lend themselves to fun treats, so that's helped to get a little more into the spirit since I'm usually trying to come up with something relevant to share. This year, I made plans for all kinds of Halloweenie treats, but none of them came to fruition. Could be because I'm a little preoccupied with the pumpkin I'm hauling around in my belly.

I'm so glad that there are so many bloggers who dug deep for monster motivation and created some devilishly delightful treats. Today I'm sharing a few of my favorites from around the "web"! {Ha, see what I did there?}

Check out these chilling creations! Have a Happy Halloween!

Sinful Sweets

Milk chocolate monster cookies

- Milk Chocolate Butterscotch Monster Cookies from My Jewish Learning

IMG_1056

- Meringue Bones with Raspberry Guts from A Sue Chef

Salted Caramel Apple Snickers Cake | halfbakedharvest.com @hbharvest

- Salted Caramel Apple Snickers Cake from Half Baked Harvest

Hauntingly Healthy Eats

Healthy Halloween Party Recipes

- Bewitching Carrot & Cabbage Salad from Sprouting Healthy Habits


- Raisin and Peanut Power Bar Pumpkins from Hungry Happenings

Vegan Black Bean Hummus - Halloween Style!

- Black Bean Hummus & Baked Halloween Chips from Paint and Tofu

Spellbinding Sips

Spiced-pumpkin-punch-with-bourbon-3

- Spiced Pumpkin Punch from Domesticate Me

Halloween Eyeball Punch - www.oliviascuisine.com

- Halloween Eyeball Punch from Olivia's Cuisine


- Boba Thai Thea Shooters from Thirsty for Tea

Tuesday, October 28, 2014

Baby Prep: HypnoBirthing + "Labor Inducing" Eggplant Parmesan


When Steve and I started discussing our preparations for baby, we decided that we'd skip the traditional classes that are offered for first time parents. This may have come as a shock because everyone knows I love to plan and prepare.

But as I mentioned in several of my other Baby Prep posts, pregnancy has been an exception to the rule when it comes to my obsessive planning and organizing traits. I realized very early on that trying to control this process would lead to nothing good. People have been having babies for millions of years; I felt comfortable relying on nature's process and calling it a day. {Especially because I had done a lot of reading before pregnancy.}

These days, there is SO MUCH information available to parents who are embarking on this adventure. It can be overwhelming. And you know what I've seen? A lot of meltdowns that occur when pregnancy, labor, delivery and the itself doesn't follow the typical route, leaving parents feeling like they're spiraling out of control early on.

Don't get me wrong; I think it's great to be prepared, especially if it gives you peace of mind. But I also think we've been bombarded with so many parenting methods and techniques in the last decade that it can hinder rather than help our plight. We've forgotten that it may be helpful to MEET our babies and get to know them before we decide how we will "handle" them. That's always made the most sense to me.

There's a lot to be said for a mother's natural instincts. My decision to keep things simple came from a desire to keep my brain unclogged and let nature dictate how things will fall into place. I didn't want to learn too many things that would confuse me or make me feel pressured to do something that maybe wouldn't come naturally had it not been suggested by one of the nation's "leading experts." The truth is, these experts have never met MY baby. I haven't even met my baby! So how am I supposed to decide what will be right for him before he even arrives? It just seemed a little backwards to me.

Though I wasn't jumping at the chance to sign up for baby care classes, breastfeeding classes, birthing classes or any of the other courses that are suggested for new moms and dads, I also didn't want to feel unprepared for the task that lay ahead -- especially the grand event of labor and delivery, which is what I had the most trepidation about. I mean, it is the first step in the process, right?

After my first OB visit, I came across a pamphlet for something called HypnoBirthing. I looked it over and almost immediately wanted to roll my eyes; it seemed a bit "crunchy" for me initially, I won't lie. But the weeks progressed and thoughts of giving birth circled around more often. I kept coming back to what I had read on the flyer about it helping to release the fear and negative images that are often attached to the birthing process. It also mentioned learning to relax and allowing the body to do its job naturally when the time of delivery comes around.

So, I talked it over with Steve and he was on board for signing up for a local HypnoBirthing class. {I think he would have agreed to anything that claimed it could potentially make labor easier on me... and on him!} The classes, as it turned out, were 2.5 hours long, meeting once a week over the course of 5 weeks. A bit of a commitment, yes, but worth a shot.

I looked over my course materials. They included a folder with lots of informational packets containing visuals of the philosophies discussed, some anatomical/biological diagrams, the course book and a "conditioning" CD called Rainbow Relaxation. Oh boy. This was going to be interesting for sure. Can we say, "Kumbaya?"

Because of a scheduling conflict, the first class we attended was with a different group than the one we would eventually join locally. We arrived and found the instructor seated cross-legged with special seats that were meant for floor sitting all set up for the attendees. By each seat, there was a small container of Play-Doh, which we wound up using to create model cervixes later in the class. Yup. So far, this was exactly what I had envisioned.

In the first session, we talked a little bit about the history of HypnoBirthing and how the founder, Marie Mongan, came up with the method as a result of being unhappy with the standard of treatment for pregnant and birthing mothers in the 1950's. In short, women were thought to be in a delicate state that required adequate medical care all throughout their pregnancies, culminating with a pretty violent birthing scenario when it was time to deliver their babies. This included strapping down of arms, general anesthesia and devices for removal of babies from the mother. Nothing "natural" about that.

After educating herself on the body's process of birthing and the history of how "modern" practices came to be, Marie decided to take birthing into her own hands and have her children naturally {gasp!}.  This was a big no-no back then. In fact, they thought she was nuts! Her doctor mocked her and, even throughout her laboring, they told her they'd wait to hear her screams before administering pain meds. Those howls never came. Though she labored calmly and peacefully {in relatively no pain} for her first two children, she was still subject to the abrupt removal of her babies in the integral moment of childbirth, leaving her feeling very ticked off. For her third child, she finally convinced her doctor to let her birth her baby the way she had always envisioned, and he was shocked at how serenely and smoothly she did so. And so, not only was her daughter born just the way she dreamed, but so was The Mongan Method.

I'm going to stop right there because I can already see many of you making faces at me and thinking I drank the hippie juice. It is not as it seems. HypnoBirthing does not claim to be completely painless or magical. It simply suggests that learning to relax your mind and body completely during those integral moments of birthing can make the experience so much more peaceful and comfortable than we imagine it to be. And doesn't that sound like a nice idea? I thought so.

Over the next few weeks, I learned about releasing fears that have been instilled in me by society {and even loved ones}, about the body's process of birthing, and about different methods of entering deep relaxation. In order to do this, I had to listen to the conditioning CD daily. Though I wasn't fond of the idea at first, it was amazing how quickly I began to enjoy this part of my evening -- it became my bedtime routine and I'd be out like a light within minutes once I learned to let tension melt away and get in "the zone." {Hence the "Hypno". As in "hypnosis", except minus the swinging pocket watch and clucking like a chicken.}

See, self-hypnosis is actually a useful technique that we can all benefit from whether we are trying to get through a tough time, learn to relax a little more or give birth to a baby. It's a natural method of intense relaxation that we do all the time without even knowing it, and it has all kinds of benefits for us.You know the times when you find yourself in a groove? Maybe while you clean, iron, shower, cook or drive to work? That's a form of hypnosis. Some people just become better at focusing it through methods of visualization and meditation, using it as a healing property. During this deeply relaxed state, our minds become more absorbent of suggestions, leaving preconceived ideas and cynicism at the door and allowing positive thoughts to take hold.

There have been scientific studies that show that hypnotism can benefit people with all kinds of traumas, injuries, psychological hurdles and stresses. In fact, my own mom underwent hypnosis after being diagnosed with breast cancer. Though she was pretty doubtful about it, she said it helped her feel better almost instantaneously -- and she's a tough nut to crack! {I had get my stubbornness from somewhere.}

Whether or not HypnoBirthing will ease the "pain" of childbirth, I can't tell you. But I can tell you that it has made a big difference in how I view my body and the process that is about to unfold in just a few weeks!

I've been asked if this means that I will refuse an epidural, and the truth is...I don't know. I can't really know until that moment comes, but I plan on using every technique possible to be as comfortable as I can possibly be, hopefully leading to a healthy and smooth delivery. This response often gets uncomfortable giggles from people, and I've become used to it. Their knowing smiles and raised eyebrows speak volumes. Some even go as far as to say something to the effect of, "Have fun with that!"

When I asked one person why she thought women like to regale each other with stories of pain and horror being the inevitable end to childbirth, she said, "Well... probably just to warn each other so they're not caught off guard." Noted. But really, do you think any woman that has a tiny idea of what birthing entails thinks it's going to be a cake walk? I mean, it IS referred to as "labor" after all.

Here's what I've learned: There's a difference between sharing words of wisdom or helpful tips and sharing frightening tales and negative messages. Why not lift new moms up and give them confidence instead of filling their minds with more fear and self-doubt? I'm sure there's already plenty of that floating around in there anyway! Would you tell an athlete who is about to run their first marathon that they will get excruciating cramps and probably gas out half way through the race? I didn't think so.

HypnoBirthing has given me confidence in my body, my mind, my baby and even gave me enough gumption to switch doctors at 34 weeks so that I would feel more comfortable with my practitioner. {My new doc has worked with HB moms and said it's pretty cool. And he's a real, certified doctor...not a witch doctor, in case you were curious.} I'm now looking forward to the process that will bring my son to me rather than dreading it, which I think is a huge first step. This means that I'm comfortable with whatever may happen during childbirth, whether it's part of what I've hoped for or not. I have no unrealistic expectations, but I do have a newfound outlook that makes me think, "Why shouldn't it be wonderful?"

And learning to fully relax? That has been a priceless skill that I wish I would have learned long, long ago!

I'll be sure to let you know how my practice is put into action when the big day comes... it's just around the corner!


In the meantime, I'm just waiting impatiently for this little nugget to arrive. Around this time, many women get the urge to do everything in their power to evict their tummy tenants -- it is quite exhausting to house someone for 40 weeks! At our last HypnoBirthing session, our instructor gave us a recipe for Scalini's Famous Egglplant Parmesan. It's a recipe served at an Italian restaurant in Georgia that is said to have sent hundreds of full-term mamas into labor within 48 hours of eating it.


Now, I don't know how true this is {I actually ate it 2 days ago and have had strong contractions but no other signs that he's coming}, but I can tell you that the dish was very good! And I don't even care for eggplant.

Though the recipe calls for stacking the eggplant lasagna-style, I made my version in single portions, sort of like Chicken Parm would be served on individual cutlets. Maybe that's why its magical properties haven't worked on me! ;)

 
So, moms-to-be... if you're full term and at the end of your rope, you may want to give it a go. Even if it doesn't work, you'll have a great dinner for you and your family to enjoy!

Scalini's Famous "Labor Inducing" Eggplant Parmesan
Adapted from Scalini's Restaurant, for the authentic version, click here

For Eggplant:
1 large eggplant, cut lengthwise into 1/4 inch pieces*
Sea salt
1/2 cup all-purpose flour
1 1/2 to 2 cups Italian seasoned breadcrumbs
3 eggs, beaten
1 8 oz. container ricotta cheese
1/2 cup grated Parmesan
1/2 cup grated Romano {I actually used an aged Havarti because that's what I had, but feel free to use your favorite cheese}
1/2 cup grated mozzarella {I like the Polly-O kind or fresh, the grated stuff in the bag is too rubbery}
Olive oil

Lay eggplant pieces out onto a large baking sheet lined with paper towels. Sprinkle with salt, then cover with another set of paper towels. Place another baking sheet on top and anchor with something heavy. Set aside for about an hour. This will remove the excess moisture from the eggplant.

1. Preheat oven to 375 degrees. Spray two 9x13 inch dishes with olive oil. Have one large baking sheet set aside for placing breaded eggplant as you go, and line another large baking sheet with paper towels for blotting cooked eggplant. Set aside. Head about 2 tablespoons of olive oil in a large skillet over medium heat.

2. Set up your breading station: In 3 separate dishes, have flour, egg and breadcrumbs ready. For each piece of eggplant: dredge in flour, shaking off excess. Dip into egg, allowing excess to drip off. Finally, coat in breadcrumbs. Set each piece onto lined baking sheet as you go. {I find that letting the breading "set" actually makes it easier when sautéing.}

3. In several batches, pan-fry breaded eggplant on each side until golden brown and crisp. You may need to add extra oil to the pan in between batches. Place cooked pieces on paper towel-lined baking sheet to drain of excess oil.

4. Ladle about half of the marinara sauce into each baking dish to cover the bottom. Place as many eggplant slices as will fit side by side on top of the sauce. Spoon about 2 tablespoons each of ricotta cheese, Parmesan cheese and Romano cheese on top of each piece of eggplant. Ladle the other half of the marinara over the eggplant slices. Top each piece with mozzarella. Sprinkle with extra herbs if desired.

5. Bake for about 25 minutes or until the sauce is bubbly and the cheese is melted.

*For the traditional version, you may slice the eggplant into rounds and "stack" the slices lasagna-style.

For Marinara:

2 tablespoons olive oil
1 cup onion, diced
3 cloves garlic, minced
2 cans diced tomatoes, blended to desired consistency
1/2 teaspoon red pepper flakes
1/4 cup fresh basil, finely chopped {or 1 teaspoon dried basil}
1 teaspoon oregano
Pinch of rosemary
Pinch of thyme
Salt and pepper to taste

1. In a large skillet, sauté onion in olive oil over medium heat until onions are tender and translucent. Add garlic and continue to cook for about a minute.

2. Pour in blended tomatoes and stir. Bring to a bubble.

3. Add in the rest of the ingredients, stir, and allow to simmer for about 20-30 minutes or until sauce has deepened in color and thickened slightly. If your sauce thickens too much, add a bit of water or broth to thin it out.

Set aside until ready to use.

 photo cred.jpg