The Kitchen Prep: fall recipes
Showing posts with label fall recipes. Show all posts

Monday, November 2, 2015

Double Pumpkin Cheddar Grilled Cheese


Have you fully recovered from the Halloween sugar high? Don't even look at me like some mini-Snickers didn't find their way out of your kid's basket and into your mouth...

I didn't eat one chocolate bar, peanut butter cup or sour candy this weekend. Mostly because I was too busy stuffing my face with everything else in the world at the Epcot Food & Wine Festival.

If you haven't ever been, let me tell you a little about it: It is a dangerous playground of tapas-style food and drink samplings from just about every country on this planet. {At least it sure feels that way.} Those Disney folks are pretty clever because they encourage you to get a special little swipe card that you load with funds and wear on your wrist for easy access at each station. And the next thing you know, you have spent your child's college fund and your retirement on escargot-stuffed croissants and Irish cream ale and all you have to show for it is indigestion and an empty bank account.
Our first stop was the Hawaiian kiosk with Kahlua Pork Sliders & pineapple wine.
Ok, maybe that's a bit of an exaggeration, but it does get pricey because every kiosk looks better than the last. On the positive side, you're walking the entire time {when you're not waiting in line because, duh, it's Disney} so you're burning calories while you are consuming them, and while I'm fairly certain that it doesn't exactly balance out, it's a nice consolation.

Anyway, between the walking, carrying all 20-some odd pounds of Cole and calling on my self control, I didn't feel like I did too much damage in the end.

It is fun, fun, fun. I highly recommend it!

That being said, we sort of missed out on Halloween festivities because we were too busy showing Cole the ways of the World {showcase, that is}. There was a tiny bit of mom guilt, but then I realized that 1.) He's not old enough to eat candy anyway and 2.) We had already given him a chance to dress up the night before and walked him around a local festival... and the guilt melted away.

My baby chef. Love, love, love.
Guess what else melts? {Nice segue, right?} Cheese. 

Yes, I know I just told you that I spend the weekend eating and I should probably spend the next week or two eating kale and air before the the holiday season gets underway... but look at this.


There is a real possibility that you are all pumpkined out by now, but I had to give pumpkin just one last hurrah since I didn't do Halloween. And besides, this isn't as terrible as you'd think.

Remember the Pumpkin Seed Pesto I recently posted as a dipper for chicken nuggets? Well, as it turns out, it makes a fantastic spread for sandwiches, too. Since I also had pumpkin puree leftovers in the fridge, I slathered that on the sandwich as well. Lastly, a handful of arugula adds a little more green, which is always a nice touch and helps to ease the conscience.


You can use whatever type of melty cheese you enjoy, but I used Cabot's Farmhouse Reserve Aged Cheddar because I like the sharp, salty bite with the creamy pumpkin and herbacious pesto. Yum times a million.

Ok, I think all the pumpkin is out of my system now. What flavors and recipes do you want to see as we enter the holiday season?

Double Pumpkin Cheddar Grilled Cheese

1 tablespoon butter, divided
2 slices bread {I used White Mountain bread,but sourdough would be good, too}
2-3 tablespoons canned pumpkin puree
1/4 cup fresh arugula leaves
1 tablespoon Pumpkin Seed Pesto {recipe found here}
About 2 ounces {or more!} Cabot Farmhouse Reserve Cheddar, sliced or shredded

1. Over medium heat, melt half the butter in a skillet.

2. Meanwhile, assemble sandwich. I made mine by spreading pumpkin puree on both pieces of bread, then spreading pumpkin seed pesto on one side. I placed the slices of cheese on one side and the arugula on the other so that the spread would hold onto them like glue, then closed up the sandwich. You can make your sandwich as you please! :)

3. Place sandwich in melted butter and toast until browned, about 3-5 minutes.

4. Lift sandwich and add remaining butter to skillet, then flip the sandwich and toast the other side until the bread is browned and the cheese is melty.

Goes great with a hot cup of soup!

Monday, October 12, 2015

Pumpkin Crackers


Every Friday morning, Cole and I head to Trader Joe's and do our grocery shopping for the following week. It has become such a part of our routine that the store employees recognize him and ask where he is if I ever pop in without him.

Now that the novelty of shopping at the uber-popular retailer has worn off {our location opened a little over a year ago}, it's become a lot easier to shop without distraction. I see you, Cookie Butter... but we've only got room for fruits and veggies in this basket.

I do, however, enjoy browsing the aisles for TJ's seasonal items because they often have creative twists on ordinary foods that inspire me to make my own spin-offs in the kitchen.

Now that we're halfway through October, shelves are filled with all sorts of pumpkin-filled treats. {For the record, the Gluten Free Pumpkin Pancakes are the only item that have managed to sneak into my shopping cart. They were good.} From Pumpkin O's cereal to pumpkin bagels to pumpkin soup... the most popular gourd of the season is in no short supply at TJ's.

When I spied their Pumpkin Cranberry Crisps last week, I felt inclined to try my hand at homemade crackers.{Naturally.} The only time I ever think to buy crackers is when I'm entertaining because they go well with spreads and cheeses and round out a party tray nicely. Plus, crackers and bread = my husband's kryptonite, so I try not to have them readily available to keep temptation at bay. Even though I probably wont make homemade crackers very often, I figured it's still a nice skill to have under my belt.

Three ingredients, no funny stuff, and way cheaper than those fancy "artisanal" crackers that come 5 to a package... I couldn't think of a reason why I shouldn't give it a try.


These really couldn't be simpler to make. Just toss flour, pumpkin and water in a mixer to whip up a simple dough, then roll, roll, roll those babies super-duper thin {and engage your core while you're at it for a quick "ab roller" style work out}, then bake until brown and crisp.


Voila. Seasonal crackers. {Admittedly, they really don't taste much like pumpkin, but do get that nice orange hue for some fall flair.}


I kept mine pretty plain -- just a sprinkle of sea salt on top -- but you could get creative and add fresh herbs to the mixture or sprinkle some seeds on top if you really want to jazz them up. And if you want to get really cute, punch out some shapes with a cookie cutter to drive the pumpkin point home.


Pumpkin perfection without any risk of falling into TJ's clever end cap snares! Sounds like a deal to me.

Pumpkin Crackers

1 cup all purpose flour
1/4 - 1/2 teaspoon salt {plus extra for sprinkling}
3 tablespoons canned pumpkin puree
About 4 tablespoons water*

1. Preheat the oven to 400 degrees. Prepare a baking pan by lining with parchment paper, or simply use a pizza stone. Let the pan or stone heat up with the oven.

2. In the bowl of a stand mixer, combine flour, salt and pumpkin puree. Add water 1 tablespoon at a time until a firm dough forms -- you don't want it to be too wet or sticky, so adding water slowly and watching for the desired consistency will help ensure that you don't add too much liquid.

3. Turn dough out onto a floured surface and knead it a few times until slightly elastic, shaping it into a ball. Set it aside and let it rest for about 20 minutes.

4. Divide the dough into 4 equal pieces. Roll each piece out as thin as possible using a rolling pin -- you want it to be as thin as you can get it so they bake up nice and crisp. Give it some elbow grease & work those abs, then you won't feel as bad as eating a few extra crackers. {If desired, cut out pumpkin shapes using a cookie cutter or a pizza cutter, or simply roll out into one thin, "artisanal-looking" piece.} Repeat with remaining dough.

5. Optional: Spray dough with a little olive oil {I just use my Misto} or non-stick cooking spray and sprinkle with desired seasonings like salt or sesame seeds.

6. Place rolled dough onto hot baking pan or pizza stone and bake for about 8-10 minutes or until they are browned and crisp.

Remove from oven and allow to cool -- they'll crisp up a little more. Once cooled, break large pieces into smaller shapes. Serve with spreads, cheese or dips.

Wednesday, October 7, 2015

Roasted Apple Bread


I do a lot of reading about blogging tips and keys to success, and what I've found is that most resources suggest very similar practices across the board:

  • Be consistent in your posting so readers know when to expect your content.
  • Share approachable recipes that the average person feels comfortable attempting.
  • Provide value to the reader by sharing ways to save time, money and energy.
And then, when I'm done taking notes, nodding my head emphatically and thinking, "Yes, this all makes perfect sense!"... I turn around and DO NONE OF THOSE THINGS. ::: facepalm :::

As much as I'd like to follow the prescription to blog prosperity, I just don't have it in me to follow directions. {When it comes to blogging, anyway. I'm a rule-follower for the most part in real life.}

I've tried scheduling, creating an editorial calendar {which I do have but have a hard time sticking to}, creating stupid-simple things that can be reproduced by folks who can barely boil water, and sharing recipes that can be made "on the cheap." I've tried sharing tips and video {like, once} and step-by-step tutorials {but, gah, I hate those. So much.}. I've tried being a "good blogger", and you know what? It isn't for me. 

So, I will most likely never be a "Pioneer Woman" or write a million cookbooks or appear on The Today Show. {Don't cry for me, I'm ok with it.} But I will do what comes naturally to me and share whatever the heck I want -- fairly often but not like clockwork -- and hope that you all keep coming around so that I'm not talking to myself over here. 

But if not, that's ok, too. Because I will be happily stuffing my face with things like this Roasted Apple Bread. 


With a crunchy exterior and a soft, chewy interior dotted with roasted cinnamon-sugar apples, this bread is hard not to devour in one sitting. 

Yeah, it takes forever. It's kind of a mess to make. It's "easy" as far as bread-baking goes, but most normal people have no desire whatsoever to undertake the task of baking their own bread. I get it. 

But, oh my. The feel of squishing your fingertips into puffy, risen dough. The smell of fresh bread baking in the oven. The ability to share bread that came out of your actual kitchen, that you made with your actual hands. There is just too much joy in that for me not to share because it doesn't fit the guidelines. Forgive me.


On the plus side, bread is pretty inexpensive to make. And it doesn't take very many ingredients. And you get to eat it while it's hot and fresh. 

That's all the convincing I've got for you. 


While I may never achieve true blogging success, I'm happy to settle for bread success. And this is it!

*The original recipe for this bread from King Arthur Flour contains chopped walnuts. Because I clearly don't like following directions, I decided to use chopped pecans instead... but then completely omitted them when I forgot to add them altogether. Oops. Bet they'd be good in there, though.  Also, this recipe suggests an 8+ hour rise {which I did allow to happen}, plus a 2 hour second rise. Since my first rise was done at 10pm, and I didn't feel like baking bread in to the wee hours of the morning, I let the bread rise in the refrigerator overnight, then removed it in the morning and let it sit at room temp for about 30 minutes before baking. I wound up putting it in the oven at 5:30 a.m. because that's when my kid woke me up. So after all that, I ended up baking in the wee hours of the morning anyway. Life's a funny thing. Anyway, just letting you know because if you need to do an overnight second rise, it'll still work out. The end.

Roasted Apple Bread
 Adapted from King Arthur Flour 


2 to 2 1/2 cups chopped apple -- a firm kind like Granny Smith or Cortland
1 teaspoon ground cinnamon
3 tablespoons sugar
3 1/4 cups bread flour or all-purpose flour
1 cup white whole wheat flour
1 1/2 teaspoons salt
1/2 teaspoon instant yeast
1 3/4 cups warm water
1 teaspoon honey
1 cup coarsely chopped walnuts or pecans

1. Preheat the oven to 425 degrees. Prepare a baking pan by lining with foil and spraying with non-stick spray. Place topped apples on the pan and sprinkle with cinnamon and sugar. Bake for 10-12 minutes or until just starting to become tender. Remove from the oven, set aside {or store until later} and turn the oven off {you won't need it again for a while}.

2. In a large bowl {big enough for the dough to rise without overflowing} or the bowl of a stand mixer, combine flours and salt. 

3. In a small bowl, stir yeast and honey into warm water, and allow to sit for 5 minutes or until it starts to foam. {You can actually toss the yeast into the flour, but I like to make sure it's alive because I've used "dead" yeast too many times. The foam or "blooming" will let you know it's alive & kicking.}

4. Pour liquid into the dry mixture, and mix until the flour has all been absorbed and a sticky dough is formed. Cover the bowl with a sheet of plastic wrap and place it in a warm, dark place to rise for about 8 hours or overnight. {Told you this recipe took a while.}

5. When the dough has risen, turn it on onto a floured surface and work in the roasted apples and nuts, if using by folding and kneading into the dough. This part is tricky, but be patient and it will mostly work itself in.

6. Grease a large stoneware baker, crock or Dutch oven {I used the ceramic insert from my slow cooker}. Shape the dough into a ball and place smooth side up in the oiled dish. Cover, and let it rise for another 2 hours. {I know... all that waiting!!}

7. When the bread is done rising, you may bake it directly in the vessel you've chosen, covered with a lid, or you can place it on a floured baking stone or pan and bake it "freeform." If you chose the later, brush it with some water before putting it in the oven. 

8. Place it in a cold oven and then set the temperature to 425. Bake for 45-55 minutes or until the outside is brown and crisp and the bread sounds hollow when you tap it. {If you have a baking thermometer, you'll want the middle to register to 205 degrees. If not, you'll have to wing it.} If you used a lid for the baking vessel, remove it for the last 5-15 minutes of baking so the crust can brown.  Note: Since I baked mine "freeform", I had to place a sheet of foil on top of the bread in the last 20 minutes or so because it was getting very dark. Use your judgement when you make yours. 

Remove from oven and allow to cool before slicing with a serrated knife. 

Now... take a bite and admit it was worth all the work! ;)


Monday, October 5, 2015

Pumpkin Spice Latte Panna Cotta


My child has an uncanny ability to detect the exact moment that I sit at my laptop to get some work done. Even when he's sleeping. It's both extraordinary and highly frustrating.

Since I'm no longer "ahead of myself" when it comes to blog posts {meaning I have nothing on standby for a rainy day}, this "gift" of his means that I haven't prioritized blog-related activities in quite some time. {Unless there's a deadline or special project, of course.}

It's hard to work on a recipe when you might have to stop mid-way, and even more difficult to keep your train of thought when your writing is stop & go. Answering emails and responding to texts {or pretty much anything requiring more than 30 seconds of my attention at a time} also fall into the category of things that have suffered as a result of staying home with the little guy.

As maddening as the lack of {perceived} productivity can be sometimes, I've cut myself some slack because, as it turns out, there is truth in that whole "The first year flies by!" adage. {We're already coming up on Cole's first birthday... what?!!} Being constantly tied to technology only makes it speed by even faster.

At this time last year, my belly was most definitely resembling a pumpkin, but since Cole was born just before Thanksgiving, I didn't have as much time for seasonal recipes as I would have liked. This year, I'm all about cramming in as many pumpkiny, appley, cinnamon-spiced things as possible just because I can... even though I still don't have much spare time. So, the biggest winners as far as recipes are concerned are those with a short prep time and handful of ingredients, extra points for holiday flavors and pretty presentation.


These Pumpkin Spice Latte Panna Cottas fit the bill. I originally saw this recipe in an email from Nielsen-Massey -- you know, the brand that Ina refers to as "good vanilla extract." Their version was a Peppermint Mocha Panna Cotta {which... yum}, but I don't shift gears to Peppermint Mocha mode until December. With a few little tweaks, I gave their recipe an October-appropriate makeover.


Truthfully, I've never been as nutty about the whole pumpkin spice thing as most everyone else is, but I who am I to deprive the masses from their seasonal sweetheart?


I'd never attempted panna cotta before, mostly because it seemed fancy and fussy. Now that I know how simple it is, I wish I had tried it a long time ago! I was surprisingly pleased with texture -- a cross between a pudding and flan. {I'm sort of funny about gelatinous things.} Unlike a pudding or custard, there are no eggs required which drastically cuts down on the cook time but still manages to achieve a smooth and creamy mouthfeel.

The addition of pumpkin puree, pumpkin spice and coffee extract creates that signature coffeehouse flavor that the crowds clamor over this time of year.


Though I served my panna cotta straight up, I was thinking a cookie crumb base, or maybe even a gooey pool of caramel in the bottom of the glass would be a great twist!

With recipes this easy to put together, I may actually get to participate in holiday entertaining... even if I have to do so between nap times. :) Give this one a try!

What flavor combination would you try in panna cotta?

Pumpkin Spice Latte Panna Cotta
Adapted from Nielsen-Massey
Makes 4 martini glass-sized servings

1 {.25 oz} envelope of unflavored gelatin
1/3 cup water
2 cups heavy cream
1/3 cup sugar
1 1/2 teaspoons Nielsen-Massey Pure Vanilla Extract
1 teaspoon Nielsen-Massey Pure Coffee Extract
1/4 cup + 1 tablespoon pumpkin puree
1/2 teaspoon pumpkin spice {plus an extra sprinkle for garnish}

1. In a small bowl, sprinkle gelatin over water and allow to soften for about 5 minutes.

2. Meanwhile, in a small saucepan, heat heavy cream over medium heat until just steaming. {You could also do this in a microwave, just be careful not to heat too much or it'll bubble over.} Stir in sugar and whisk until sugar is dissolved.

3. Remove from heat and whisk in vanilla extract, coffee extract, pumpkin puree and pumpkin spice until well-combined. Pour in softened gelatin and stir until it is fully dissolved. Cool slightly.

*If you're attempting my cookie crumb or caramel idea, this would be the time to put it into the bottom of your glasses or serving dishes.

4. Divide liquid evenly among martini glasses or serving dishes {yield will vary based on what you use, of course}. Cover with plastic wrap and refrigerate for about 2-3 hours until chilled and set.

Garnish with a dash of pumpkin spice or cinnamon if desired.

Disclosure: I was not compensated for this post, but I did receive samples from Nielsen-Massey for my use. As always, the opinions here are all my own!

Tuesday, September 22, 2015

Pumpkin Spice Beer Bread


I turned 34 yesterday. Whoa. I have no idea how I got here. It sort of feels like when you get in the car and, before you know it, you've arrived at your destination with no recollection of the drive. Well, kind of, anyway.

I certainly remember the majority of the milestones and landmarks that have led to this day. Reflecting on them is one of my favorite parts of celebrating a birthday, in fact. But still, I feel like it wasn't that long ago since my friends threw me a birthday celebration in their college apartment where I wore a pink boa and drank things that I'd probably use to unclog a drain these days.

My friend actually posted this to Facebook yesterday after I'd already written this post.
Perfect timing!
We drove up to Gainesville just a week ago for our annual visit and, sitting in an old college bar surrounded by sticky tables, half-filled plastic cups of cheap beer and, for lack of a better word, babies, I was quickly reminded that over 10 years has definitely elapsed! On the bright side, I had a conversation with a nice kid that went something like this:

Kid: {While bouncing quarters into cups of lukewarm beer.} Your boyfriend is awesome!

Me: Oh, my husband? Thanks!

Kid: {Giving quizzical look.} Your husband? {Like I said, my alien. Or my

Me: Yeah, we're married...

Kid: :: blank, confused stare ::

Me: Oh... we're "old!"

Kid: :: eyes widen :: Like, how old are we talking?

Me: I'm about to turn 34. He's 33.

Kid: Wait, what??? Noooo... no way. I would never have guessed. Really?

Me: {Not sure if that's good or bad} Haha, um, thanks.. Yep. We met here when we were students. We've been together for 11 years. Married for 6. Have a baby. You know... old.

Kid: {mind. blown.} OMG, That's CRAZY. Well, you guys are awesome.

Me: You can still have fun when you're in your 30's, you know.

Kid: ::: attention already shifted to next drinking game :::

Oh, man.

It is a nutty, twisty, exhilarating thing, this life. Every year I am struck with pure amazement when I think about how many wonderful people I've crossed paths with, how many things I've learned and all that I've accomplished in a mere 365 days.

And let's not forget all the fantastic things I've cooked and eaten. {And sipped!}


This Pumpkin Spice Beer Bread is such an appropriate thing to celebrate this occasion. First, it reflects my autumn{ish} birth date with the warm fall flavors of pumpkin spice. It represents my love of baking and sharing, since this recipe makes one loaf to keep and one to give away. And since I'm reminiscing about the college years, there's even a glug or two of beer in the recipe.


Though there's beer in the recipe, it's really more like a traditional pumpkin bread and less like a beer bread. I think the seasonal beer I chose {Leinenkugel's Harvest Patch Shandy} gave it just the right amount of fall flavor, but you could choose any type of beer you enjoy. I'd also love to try this with some toasted pecans on top, or maybe some mini chocolate chips added to the batter. I mean, you can't go wrong with chocolate...


So let's clink glasses {or loaves?} because I can't imagine having more to celebrate than the gift of another year!

Pumpkin Spice Beer Bread
Barely adapted from Southern Living
Makes two large loaves or 4 small loaves

2 cups sugar
1 cup canola oil
2/3 cup pumpkin or seasonal beer {I used Leinenkugel's Harvest Patch Shandy. IT'S SO GOOD.}
2 teaspoons vanilla extract
1/4 cup honey
4 large eggs
1 (15-oz.) can pumpkin
2 1/2 cups all-purpose flour
1 cup whole wheat flour
2 teaspoons salt
2 teaspoons baking soda
1 teaspoon baking powder
1 teaspoon pumpkin pie spice

1. Preheat the oven to 350 degrees. Prepare to 9x5 inch loaf pans by buttering or spraying with non-stick cooking spray. {You may also make 4 mini loaves if you prefer.}

2. In a stand mixer {or in a large bowl by hand} beat together sugar, canola oil, beer, vanilla and honey until well-combined.

3. Add eggs, one at a time, beating after each addition. Add pumpkin and mix until fully incorporated.

4. In another bowl, whisk together flours, salt, baking soda, baking powder and pumpkin spice. Add flour mixture to pumpkin mixture, mixing until just incorporated.

5. Divide batter evenly between prepared loaf pans {or mini loaf pans}, filling them 3/4 of the way. Bake at 350 degrees for 55 minutes to 1 hour and 10 minutes*, or until a wooden toothpick inserted in center comes out clean. {Note: If the top begins to brown to much, you can lightly place a sheet of aluminum foil on top to prevent over-browning.}

Cool bread in pans on a wire rack 15-20 minutes before attemping to remove from pan. I prefer waiting until it's cool enough to handle to ensure that it doesn't crumble to pieces.

*For mini-loaves, decrease bake time to about 30-40 minutes or until a toothpick inserted in the center of a loaf comes out clean.

For Glaze {Optional}
1 cup confectioners sugar
2 tablespoons beer
Sprinkle of pumpkin spice {scant 1/8 teaspoon}

Mix all ingredients together until smooth. Drizzle over cooled bread if desired.

Friday, September 18, 2015

Orca Bean, Kale & Pumpkin Crostini | Bob's Red Mill + Stonyfield Organic


The end of September signals the beginning of the craziest time of year for me. While Mother Nature slows down and goes into hibernation mode for the winter, I go into hyper-drive.  In my family, we get about 30 seconds to enjoy the newness of fall before we propel ourselves into 4 birthdays all within the last 2 weeks of the month, Halloween, Thanksgiving, Christmas and a partridge in a pear tree. It happens in the blink of an eye, and I feel like once we reach this point, I don't have a spare second to breathe again until the second week of January or so.

Don't call me, I'll call you. 

This year, I also have my baby's 1st birthday {gasp!!} thrown into the mix, and though I've promised myself that I will not go overboard {shyeah... right.}, there is lots of planning and organizing in the works. Because babies only turn 1 once, and freakin' Pinterest. 

But the madness doesn't have to infiltrate all parts of my life. In fact, I like to pretend that fall is all snuggly and lazy and sweaters and pumpkins. {As opposed to humid and hectic and sweltering.} In my imagination, the leaves are turning colors and I can pull out some comfy boots and cook warm, hearty comfort foods like soups and stews. 

Though it isn't "Soup"tember in real life, I still like the idea of switching gears and using some of the ingredients that we tend to bust out in the autumn season. Like butternut squash and apples and beans. 

Have you ever seen beans like these? They're called Orca Beans and I'm sort of in love with them. They remind me of, well, an orca whale. Or a cow. Or a dalmatian. All animals that I find adorable.


Not only are beans hearty, fiber-filled and great for using in robust fall meals, but these particular beans are also en vogue with the colors of the season! Though it's still a little early, these black and white beauties put me in a festive mood, so I broke out the canned pumpkin and put together some snacks that would look great on a fall or Halloween buffet.


Don't you just love a crostini? Crispy bread, slathered with a creamy concoction and topped with savory bits. Here, Bob's Red Mill Orca Beans are the star, simply dressed with sauteed onions, garlic and kale confetti. A smear of pumpkin ricotta spread gets a tart zing from Stonyfield Greek yogurt and acts as both a glue and a festive contrast for the beans.


Let's slow down for a snack break together and munch on some of these tasty bites!

Disclosure:  I have an ongoing partnership with Stonyfield as a member of their Clean Plate Club and received this product for review. As always, the opinions here are all my own!

Orca Bean, Kale & Pumpkin Crostini
Makes about a dozen

1/2 cup pumpkin puree 
1/4 cup Stonyfield plain Greek yogurt
1/4 cup + 2 tablespoons ricotta cheese
1/4 teaspoon salt
1/2 cup Bob's Red Mill Orca Beans, cooked according to package directions
1/2 a small onion, diced
2 cloves garlic, minced or grated
1 cup finely chopped kale, or your favorite greens
12 pieces of toasted French bread, or favorite bread

1. In a medium skillet, heat a few teaspoons of olive oil over medium heat. Add onion to the pan and cook until softened and translucent, about 4-6 minutes. 

2. Add garlic and cook for another minute or so. Add kale and cook until wilted down, about 3-5 minutes. Stir in cooked beans, season with a sprinkle of salt, and allow the beans to heat through.

3. Meanwhile, in a small bowl, mix together pumpkin, Greek yogurt, ricotta cheese and salt. Spread a heaping tablespoon onto each slice of toasted bread.

4. Scoop a heaping tablespoon of the bean mixture onto each piece of bread.

Serve while still warm or at room temperature.

Wednesday, November 19, 2014

Spiced Cider Braised Pork Tenderloin | Sponsored Post: Fiji Water - Perfection Takes Time


Think of some of your favorite dishes to eat and make around the holidays. The ones that warm your soul and bring feelings of nostalgia welling up from deep inside. You know the ones I'm talking about.

Grandma's homemade pies. Mom's slow-cooked roast. Your family's famous Sunday "gravy". 

Many of these dishes have one thing in common: They take time to make. That's why they're so special! Because you don't have time to whip them up on a daily basis. They may only make an appearance once a year, and therefore, they earn a special place of honor when they do show up at the dinner table.

I know many of us have fallen into the "30 Minute Meals" mentality because, well... life. Most of us don't have the luxury of being able to start a slow-cooked dinner at 10 a.m., which is a shame because who doesn't love the thought of coming home to something that's been baking, roasting or simmering all day long?


Sure, shortcuts can still produce some pretty delicious meals, but the truth is simple: Perfection Takes Time.

The best things in life often do. 

Fiji Water knows all about how perfection is a process not to be rushed. Starting as rains falling over the Fijian rain forest, Fiji Water makes its way from the clouds down through layers of ancient volcanic rock. Along the way, it gathers minerals and electrolytes that give the water it's distinct, smooth taste. Finally, it gathers in a protected artesian aquifer where it sits until it is bottled at the source.


Now, doesn't that make Cider Braised Pork Tenderloin sound like a cinch? ;)

In honor of life's slow and wonderful processes, I came up with this seasonal recipe that takes a little time but is so worth the effort.


Pork tenderloin is seasoned, seared and braised, nestled among onions, apples and fragrant sage in this slow-cooked meal. It's both simple and succulent. Because the meat cooks for several hours, it becomes fork-tender and absorbs all the amazing flavors that surround it as it simmers away. 

Your house will smell like fall, and your taste buds will rejoice when they taste the product of patience -- pure perfection.


Get this and other "Perfection Takes Time" recipes on Fijiwater.com.

Disclosure: Compensation for this post was provided by Fiji Water via Honest Cooking. As always, the opinions here are all my own!

Thursday, October 2, 2014

A {Gluten-Free!} Pumpkin Carving Party Menu | Sponsored by McCormick

The weather is cooling down{ish}, the leaves are turning colors... it's almost time to bust out the pumpkin-carving knives and get in the fall spirit!


October is the perfect excuse for gatherings centered around autumn's fun activities like football watching and eating pumpkin everything. So, why not host a little Pumpkin Carving Party complete with a pumpkin-filled menu to get into that festive state of mind?


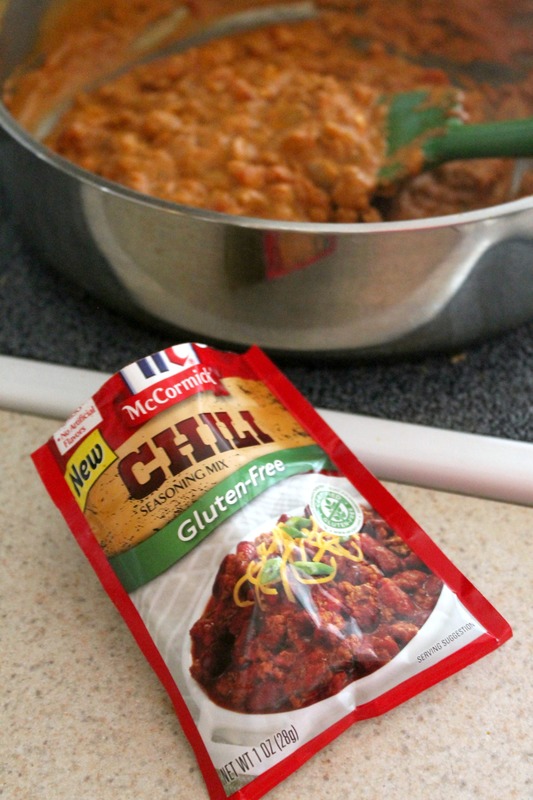
I got the chance to try out McCormick Gluten-Free Recipe Mix packets that make seasoning your fall favorites an easy task and couldn't help but run with the pumpkin-loving theme. First and foremost, creating a menu was in order for a fabulous fall event:

Pumpkin Carving Party Menu

Your favorite fall Soup or Stew

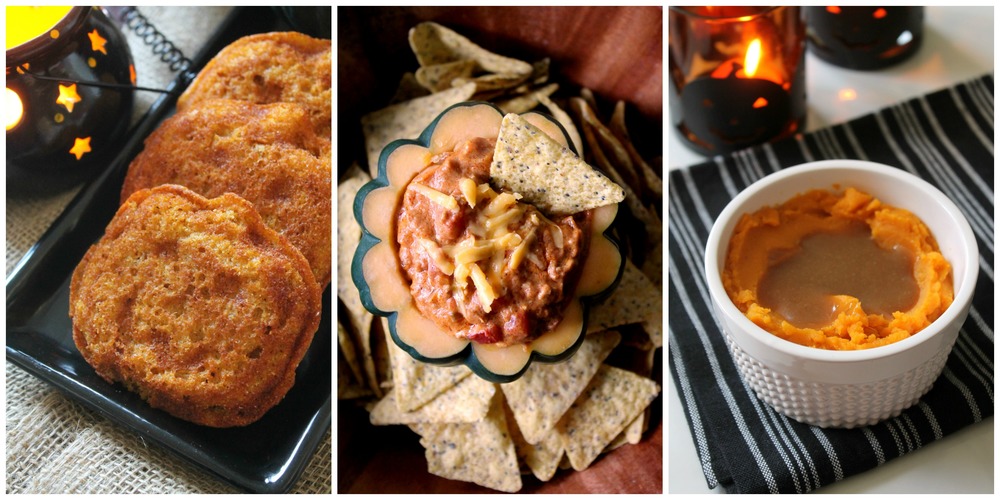
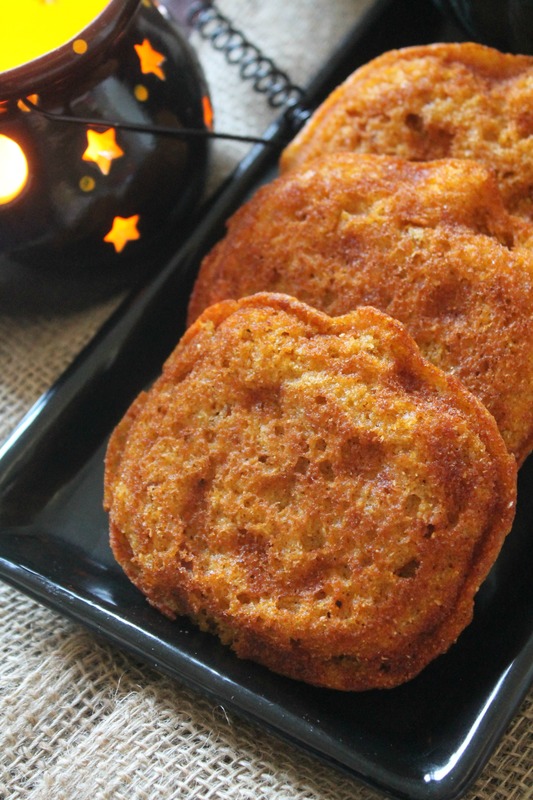
Taco-Spiced Cornbread Pumpkins (see below for recipe)

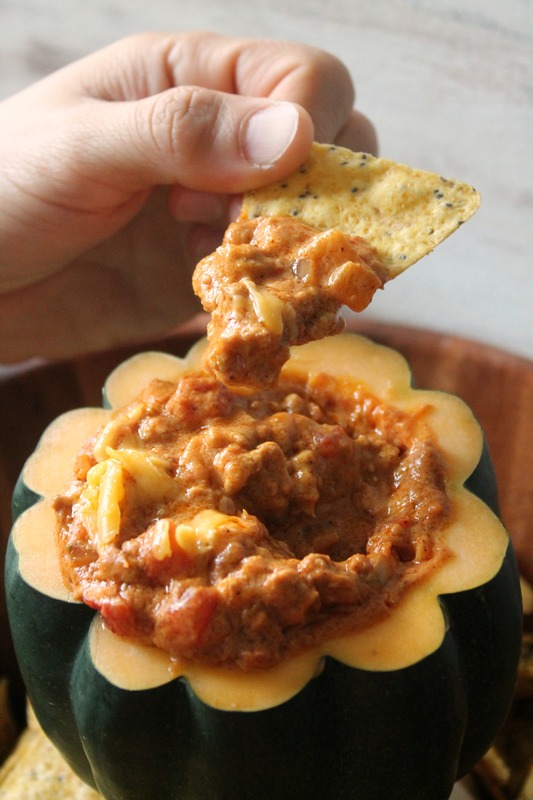
Cheesy Turkey-Pumpkin Chili Dip (see below for recipe)
served with tortilla chips and dippers
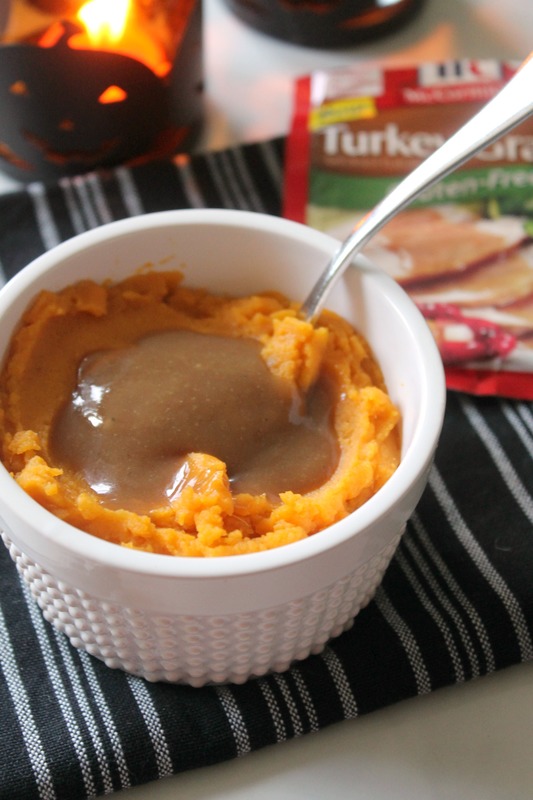
Sweet Potato-Pumpkin Mash DIY Bar
featuring McCormick Turkey Gravy & all the fixin's!

Various Pumpkin & Autumn Desserts


These Taco-Spiced Cornbread Pumpkins are not only cute, but also a flavorful accompaniment for your soups, stews and chilis during the chilly months ahead! Because the recipe uses McCormick Gluten-Free Recipe Mix and no flour, it's perfect for family and friends who avoid wheat products.


Cheesy Turkey-Pumpkin Chili Dip will really knock everyone's socks off, especially when you serve it up in a gorgeous little gourd. So on-theme! It's meaty and creamy with a spicy kick and makes an excellent snack while you carve out Jack!


Finally, extend the DIY beyond the pumpkin carving with an interactive Sweet Potato-Pumpkin Mash DIY Bar! Guests will love customizing a scoop of this creamy twist on mashed potatoes. Set out toppers like shredded cheese, sour cream, fresh chopped herbs and crumbled bacon... and don't forget the McCormick Gluten-Free Turkey Gravy!

Once the stage is set with all sorts of pumpkin delights, you can easily put together a simple party for all to enjoy!

1. B.Y.O.P. Ask guests to bring their own pumpkin, or provide gourds of all kinds for friends and family to choose from once they arrive. Get creative with pumpkins of all shapes & sizes!

2. Smart set up for easy clean up. Set your table {if you have an outdoor space, even better!} with newspaper, kraft paper, or something that you can easily crumple up and throw away once the carving and gutting is done. Pumpkin carving is a messy business! Make sure to set out several bowls or buckets for the gooey middles. And don't forget to save the seeds for roasted snacks you can make later!

3. Provide inspiration. Stencils, paints, stickers and even cookie cutters can be used to give fall flair to your creations. Create a buffet of fun embellishments and details {along with carving tools, of course!} that will help your guests get inspired.

4. Dig in and have fun! Keep food and drinks nearby for noshing and mingling during the party. Between using the pumpkins as a creative medium and snacking on the delightful goodies you've made, your guests will be talking about your Pumpkin Party for seasons to come!

Featured Recipes:


Taco-Spiced Cornbread Pumpkins
1 cup yellow cornmeal
1/2 teaspoon baking soda
1 teaspoon baking powder
1 1/2 tablespoons McCormick Gluten-Free Taco Seasoning Mix
1/4 teaspoon sea salt
1 egg
2 tablespoons melted butter, plus extra for greasing tin
1 tablespoon honey
3/4 cups plain Greek yogurt

1. Preheat the oven to 400 degrees. Liberally butter or spray your muffin tin or pumpkin-shaped mold. Set aside.

2. In a medium bowl, whisk together first 5 ingredients.

3. In a small bowl, whisk together the wet ingredients until smooth.

4. Pour the wet ingredients into the dry ingredients and mix until just incorporated. (The batter will be pretty thick.)

5. Scoop the batter evenly into greased tin or mold. Bake until just starting to brown on top, about 9-11 minutes.*

6. Remove from oven and let cool for about 5 minutes so they are easier to handle. Carefully flip from tins or molds. If they stick, run a paring knife around the outer edge to loosen.

Serve warm with soup, stew or chili.

*Cooking time will depend on the type of tin or mold you use. It's best to check on them frequently to make sure they do not overbake. Yield will also depend on the size and shape of the baking tin.


Cheesy Turkey-Pumpkin Chili Dip

1 tablespoon olive oil
1/2 an onion, chopped
1/2 pound turkey meat
1/2 a packet of McCormick Gluten-Free Chili Mix
1 (14.5 oz.) can petite diced tomatoes
1/2 cup canned pureed pumpkin
4 ounces cream cheese
4 ounces shredded sharp cheddar cheese, plus extra for garnish

1. In a large skillet over medium-high heat, heat olive oil. Add chopped onion and sautee until softened, about 4-5 minutes.

2. Add turkey meat to onion and break up with a wooden spoon (my favorite tool for this job is a potato masher!). Cook until no longer pink.

3. Sprinkle McCormick Gluten-Free Chili Seasoning over top and stir to coat all of mixture. Add diced tomatoes to meat and stir, scraping up any browned bits on the bottom of the skillet.

4. Stir in pumpkin puree. Add cream cheese and shredded cheddar and stir until the cheeses have melted into the mixture.

Serve in a hollowed out pumpkin with tortilla chips or your favorite dippers.


Sweet Potato-Pumpkin Mash

1 large sweet potato*, baked or boiled and mashed
1/3 cup pumpkin puree
1 tablespoon butter
1 tablespoon maple syrup
1/4 teaspoon sea salt (or to taste)
1. Beat all ingredients together with a hand mixer until smooth. Set out mash in a covered bowl to keep warm or in a slow cooker set to low.
2. Encourage guests to "embellish" their Sweet Potato-Pumpkin Mash with various toppings and gravy.

*This can easily be doubled or tripled for a larger crowd as well.

For Turkey Gravy:

1 (8.8 oz) Package McCormick Gluten-Free Turkey Gravy mix
1 cup water

1. Stir water gradually into Gravy Mix with whisk in small saucepan.

2. Stirring frequently, cook on medium heat until gravy comes to boil. Reduce heat and simmer 3 to 4 minutes. (Gravy will thicken upon standing).

For DIY Bar:

- McCormick Turkey Gravy
- Various shredded cheeses
- Sour cream
- Finely Chopped Herbs
- Crumbled Bacon

Get rid of the gluten, but not the flavor with McCormick Gluten-Free Recipe Mixes! Visit allrecipes.com recipe collection to discover more flavorful gluten free eating and meal ideas!

Disclosure: This is a sponsored conversation written by me on behalf of McCormick Gluten-Free Recipe Mix. The opinions and text are all mine.

Sweepstakes ends on October 27, 2014 at 11:59 p.m. ET (the "Promotion Period"). Sponsor's servers are the official time-keeping device for the Sweepstakes.

Monday, September 29, 2014

Pumpkin Butter Thumbprint Cookies


You guys. My life has been changed forever.

They {finally} built a Trader Joe's within a decent distance of where I live. It opened 2 days before my birthday. I'm fairly certain they planned that out that as a gift to me. Thank you to all those who came together to make it happen.

As the sun rose last Sunday and I opened my eyes on the first day of my 33rd year on this planet, my sweet husband wished me a happy birthday. I cleared my throat and responded, "Can we get to Trader Joe's before it get's packed?"

Signs you're getting old.

Because Steve is so good to me and wouldn't dream of shattering my birthday plans, we were up, dressed and wandering the aisles of TJ's by 8:15 a.m. It was magical.

I may be over-exaggerating a tiny bit. {But not by much.} I mean, it's a grocery store, not one of the wonders of the world. {Though I warn you, do not argue this point with anyone who is a huge fan. You will lose.}

However, I can tell you that as we stood there with our mouths agape staring at a wall of reasonably priced, {organic!!!} packaged greens of every possible combination you can think of, we knew we had stumbled onto something special. I even heard Steve mumble, "Is this for real?"

It is real, my dear, and it is glorious.

Now, navigating TJ's as a "first-timer" can be a tricky feat. Because you'll want to buy all the things. I'm talking stuff you have no need for and hardly ever eat. "But it's only $1.99!", you'll rationalize.

PUT DOWN THE CHILI-LIME ROASTED ALMONDS AND WALK AWAY. No, do not stop to look at the multitude of nut butters {or cookie butter, for that matter. There is no nutritional value in cookie butter even if it's housed right next to the chia and flax peanut butter.} that are suddenly available to you. You came for almond butter, now put the almond butter in your basket and back away slowly.

Ok, so I may not have left completely unscathed. It was my first visit, and my birthday for heaven's sake, cut me some slack. I splurged on a small jar of Pumpkin Butter because it was there and fall was officially beginning that week. So, clearly it was a necessity.

{Pumpkin Butter, incidentally, has very little to do with pumpkins or butter. It's more like a very sweet jam infused with pumpkin spice-type flavors that you can spread on muffins, drizzle over ice cream or use as a pastry filling. Like apple butter, except pumpkiny.}

Then, as penance, I came home and decided to use the Pumpkin Butter in a recipe to share with you. Because I'm considerate that way and because otherwise I may have simply eaten it by the spoonful.


Is there anything that brings greater feelings of nostalgia than a thumbprint cookie?

For the cookie part of these, I used a cream cheese dough that I adapted from Allie's recipe {Baking a Moment} to make them a bit sturdier, and rolled them in toasted pecan bits for some crunch. Then, I filled the centers with TJ's autumnal Pumpkin Butter. You will not be sorry that you sacrificed some of your beloved Pumpkin Butter for these babies.


So, tell me, do you have a Trader Joe's near you? Have you found yourself doing the dance of the conflicted grocery shopper in their kitschy aisles? Go ahead, divulge what your TJ's splurges are... make me feel better! ;)


Pumpkin Butter Thumbprint Cookies
Cookie dough adapted from Baking a Moment 
Makes about 2 dozen cookies depending on size

1 stick {8 tablespoons} butter, softened
3 ounces cream cheese, softened
1/2 cup sugar
1/2 teaspoon vanilla extract
Pinch of sea salt
1 cup + 2-3 tablespoons all-purpose flour
1 egg + about 1 tablespoon water, beaten
1/2 cup toasted pecan bits
Pumpkin Butter for filling


1. In the bowl of a stand mixer, beat together butter, cream cheese, sugar, vanilla extract and salt until smooth. Slowly add in the flour and mix until just incorporated.

2. Scoop dough onto a sheet of plastic wrap and form a log shape. {This isn't absolutely necessary but it helps later on when the dough is solid to get even pieces more easily. I also divided it in 2 to make it easier.} Refrigerate for about an hour or two until the dough is mo easier to handle.

3.Preheat oven to 375 degrees. Prepare a baking pan by lining with a silicone baking mat or parchment paper. Beat egg and water in a small bowl. In another bowl, place pecan bits for rolling. Set aside.

4. When ready to continue, take dough by the tablespoonful and roll into a ball. Dredge each ball in the egg & water mixture, then drop into the pecans and roll around to coat. Place onto the prepared pan. Continue until all the dough is used up.

5. Spray the rounded side of a teaspoon measure with non-stick cooking spray {I just use my Misto filled with olive oil} and, using even pressure, push down on the top of each dough ball to create an indentation. You can do this with your thumb, too, {hence "thumbprint cookie}, but I find that using a teaspoon creates a more even well.

6. Fill each well with a heaping 1/2 teaspoon of Pumpkin Butter {or however much you can fit!}.

7. Bake for about 12-14 minutes or until the edges are just starting to brown and the cookies are set. Remove from oven and allow to cool before moving the cookies to a cooling rack -- they will be soft and hard to move when they're warm.

Note: I found that I achieved the best results by refrigerating the dough balls for a while after rolling them so they weren't too soft going into the oven. My cookies held their shape better when I used this technique. It isn't necessary but it makes for prettier cookies.

I also made a version of these without nuts and they were very tasty, too! They do spread a little further, so take that into account when placing onto the baking pan.


Tuesday, September 23, 2014

Baby Prep: Pregnancy Update + Cardamom-Fig Granola


Disclosure: I am honored to be a member of the Stonyfield Clean Plate Club. I received product or coupons for writing this post, but all opinions are my own.

Thirty-three weeks today. This whole baby developing thing is one of the fastest slow processes ever.

It's hard to believe that in just a handful of weeks Cole Thomas will be joining us out here and our lives will never be the same again. Preparations are well under way now that the nursery has officially been started and we've begun taking some birthing classes {HypnoBirthing, to be exact. I can't wait to tell you more about it.} It's gettin' real, folks.

Last weekend we were given a lovely baby shower by my in-laws. It was more of a celebration in honor of the baby {with both men and women in attendance} than a traditional shower with girls and games, which I enjoyed. We were inundated with love and gifts for our boy, and I came home and immediately started organizing. At 11pm. This nesting thing is no joke.

Pregnancy has been such an interesting time for me. I mean, it is for everyone I'm sure, but it has been amazing to see how nature takes over and prepares you for this wondrous event even when you're not a gal who ever had baby fever and who was convinced that it would be the most miserable experience ever.

Everyone who knows me well has marveled at how calm I've become during this time. I am not a laid back individual normally -- I'm a fan of control when possible. But that's just the thing; when you're having a baby, you realize that so much is out of your control that the outcome has been a new-found ability to just "go with it." I wonder if there's a way to request that this trait stay with me even after he's born.

Here's a little "almost there" update on what's been going on in my pregnant world:

The Belly: It feels really big now. Everyone tells me that it looks like I swallowed a basketball {or any variety of round objects, really, I've heard so many} because my bump is mostly concentrated in the front & center, which is fine by me. Sometimes I look at myself from the back and pretend I'm not pregnant, but then the belly just seems all the more shocking when I turn back around.


Weight: So far, I've gained a grand total of 21 pounds. I was petrified that I would balloon out of control when I first started seeing the numbers on the scale go up. I actually wrote a whole post about it, which I've been planning on sharing but haven't just yet. Women gain weight at all different rates and there are so many factors that come into play that it isn't even fair to compare one to the other. Luckily, though I felt like I gained weight quickly in the beginning, it progressed in a slow and steady fashion with the help of trying to eat well and staying active. I'm on track to be within the "healthy" range for a person my size by the time I deliver.

Movement: This kid is nuts. I'll be sitting there trying to work and my bump will start shape-shifting before my very eyes as he kicks and gets comfortable. I haven't had an ultrasound since I was 18 weeks along, so I often imagine what position he's in and what in the world he's up to in there. It feels like he has very pointy elbows.

Clothing: I'm still wearing mostly non-maternity stuff {loose & stretchy}, though some tops and sundresses have started coming up too high as they accommodate the bump. Maternity jeans & leggings are a godsend. I hate that I love them, but I do. I can still wear my old J.Crew shorts with the belly band, but it's not as comfy as slipping into those stretchy clothes made for round bellies.

Inconveniences: 
Stretch marks - Nope {not yet, anyway}.
Swelling - Feet have gotten puffy a few times if I've been outdoors or on my feet for long periods of time, but no "cankles" yet.
Tummy troubles - Very few bouts of heartburn, which I used to get occasionally anyway even when I wasn't pregnant. "Reflux" if I drink too much water or am too full. Nothing too terrible or annoying.
Peeing - Sometimes having to get up twice at night to go.
Waddling - I'm still exercising most mornings, but my power walk feels more like a power waddle depending on the day. I'm not as comfortable as I used to be, but it's not unbearable. I just have to make more of a conscious effort on my posture so I'm not leading with the belly.
Hormones - I haven't been super emotional or cranky or anything during most of my pregnancy. If anything, I think pregnancy hormones have regulated some that may have been off kilter before! But I did cry over this commercial the other day. I mean, who wouldn't, though?
Braxton-Hicks - That's "practice contractions" for those of you who are unfamiliar. I've had these a few times and they don't hurt, but they feel like your abs have decided to do crunches without your consent. Very strange sensation. I also went walking in the evening last week and was not hydrated enough causing some major cramping. It was not pleasant and a little scary. This little nugget needs to stay put until he's fully baked.

Perks: My hair has never been shinier. My nails grow fast. My skin has been amazing -- no breakouts. {I have had some extra darkening -- a.k.a. "melasma", which I had before as well, but it's not awful.} I've probably had 2 headaches in the past 8 months which is mind-blowing since I would often get headaches before I was pregnant. People are super nice to you when you have a visible bump.

Preparations: As I mentioned, we finally took apart the guest room and are now stockpiling baby things in there. The only thing that's fully built is the glider {which I am in love with}. We are still deciding on a crib, but I think I've narrowed it down and will be ordering one this week. I have a good idea of the finishing touches {rug, art, etc.} that I'd like, but am holding off a little longer. My sweet friends are throwing me another baby shower in a week and half, and after that we'll really get going on finishing things up.


His closet is SO FULL of clothes. I will have to change him every hour on the hour just so he can get a chance to wear all these cute things. I may have to anyway with all the spit up and poo that will be happening.

We've got a good amount of "gear"-- car seat, stroller, a vintage baby buggy that was used by my husband and his brother, swing, high chair, tub, etc. etc. We will have to find a home for all these wonderful items so it doesn't look like we're living in BabiesRUs.

This is just a tiny bit. 
Farley has started to walk around in the room and sniff things. I think he knows some big changes are on the horizon.

Stuff I'm loving:

- I'm obsessed with L'Occitane's Almond Delicious Soap. I blame it on my mom who spoils me by buying me tiny, expensive soaps that I'd never get for myself. It is scrubby and softening and it makes me feel like I'm doing something just for me when I use it. Like a little spa break every time I shower. Someone gifted me with a few bars as part of my baby shower gift. I almost cried with joy.

Pure Fiji White Gingerlily Lotion. If you've ever wondered what I smell like {because that's a completely normal thought}, it's this stuff. I have loved it for quite some time, but I now slather it all over my belly after showers because the skin can feel all tight and it needs a little love. They carry this brand at really nice spas, so again, it makes me feel like I'm being pampered it just by using it. Apparently that's a thing with me.

My pregnancy journal. Before I got pregnant, I decide that I'd like to have a place to jot down thoughts and notes for posterity. So, I looked online for journals that might work and discovered very quickly that I hated most of them. I'm not into all the gooey baby type designs. {I'm weird, what can I say.} I did find these custom journals , but in the end, I decided to design my own on Zazzle. I love how it turned out {though I wish it were hard bound instead of floppy} and I've been trying to write in it as often as possible.

It says "Great Expectations -- The Story of Expecting You"
A good friend also bought me this book and I -- the listmaker -- am really enjoying filling it out!

Having a pregnancy countdown bucket list. Somewhere around the 20 week mark, I got more excited and less patient with this whole pregnancy thing. I needed motivation and something to look forward to {aside from the bundle of joy himself, of course} every few weeks to move things along. Our schedules are pretty busy as it is, but I wanted fun "mile markers" to treat myself to and speed things up. Best idea ever!

So far, most of the treats are food related {birthday lunch at Christopher's Kitchen; visiting the new Trader Joe's that just opened, etc.}, but some of them have to do with pampering {spa day!}or time with friends. Other tasks have included things I've wanted to do for a while that we never get around to {free admission Thursdays at The Norton Museum; Farmer's Market on Sunday mornings}. Having these things on my calendar keeps me looking to days ahead, happy and active.

Food. My current favorites happen to be: Fruit {still}. Raw green peppers and hummus {I don't even care for green peppers usually, but I'm enjoying them now}. Peanut butter & bananas. Dark chocolate. {I'll raid my baking pantry & eat dark chocolate chips for "dessert". It also helps that Lindt sent me a lifetime supply -- ok, maybe a few months supply -- of their amazing Excellence chocolates for my tasting party that I still have for snacking.} Coffee. {Still doing decaf.} These gluten free pretzel sticks as a treat every now and then. {Like crack, I tell you.} Cheese. {What else is new?} Yogurt. {You must try this new stuff, more about it below.} Cereal and granola.

Frame of Mind: Great. Am I looking forward to labor? Not particularly, but I have so much less worry about it than I did in the beginning. Some of that I think is just a natural part of getting closer, but some I attribute to the HypnoBirthing classes I mentioned. Yes, they're sort of "granola", but I love the positive feelings I get from practicing their techniques. More on this later.

Meanwhile, let's talk REAL granola. The edible kind.

..............................................................


As much as I love the convenience of buying store-bought granola, there are 2 things that deter me from doing so: Price and funky ingredients. I know there are a lot of good ones out there that are on the healthier side, but the truth is it doesn't take too much effort to easily whip some up at home. That way you can control the amount of sugar and preservatives, and keep it relatively inexpensive to boot.

Plus, you have the added perk of being able to make ANY flavor granola you choose! I mean, the possibilities are endless.

Since Fall flavors are on my mind, I played with cardamom and fig for this batch. I threw in some ground flaxseed and chia seeds for added nutrition, and walnuts for added texture and flavor. It's great alone or with a splash of almond milk... or for a real treat, sprinkled over some Petite Creme with a dab of extra Bon Maman Fig Preserves. That's basically dessert.


Stonyfield sent some of their Clean Plate Club members their new product, Petite Creme, to try out with Bonne Maman preserves and they didn't disappoint. If you're not a fan of "going Greek" when it comes to your yogurt, Petite Creme is for you. It's much milder, less thick and smoother in flavor than its Greek cousin. And it happens to go amazingly well with this granola.


Sweet, crunchy and simply addictive, I think this combo will be part of your Fall lineup.

Cardamom-Fig Granola

2 1/2 cups rolled oats
3/4 cups walnuts, roughly chopped
2 heaping tablespoons ground flaxseed
2 tablespoons chia seeds
1/2 teaspoon ground cardamom
1/4 teaspoon sea salt
1/3 cup coconut oil, melted
2 tablespoons maple syrup
1 tablespoon honey
1/4 cup good-quality fig preserves, such as Bon Maman
2 teaspoons vanilla extract
Optional: Dried figs, chopped {I didn't have any, but I think they'd make a good addition!}

1. Preheat oven to 300 degrees. Line a baking pan with parchment paper or a silicone baking mat. Set aside.

2. In a large bowl, mix together all ingredients until well combined. {To make combining a bit easier, I heated the oil, syrup, honey & preserves in the microwave for a minute to help them loosen up and become more liquid.}

3. Spread mixture onto prepared baking sheet in an even layer. Bake for about 45 minutes, giving it a stir every 15 minutes or so to promote crispness and even toasting.

Let cool before packaging. Goes great over yogurt or eaten as cereal.

 photo cred.jpg